
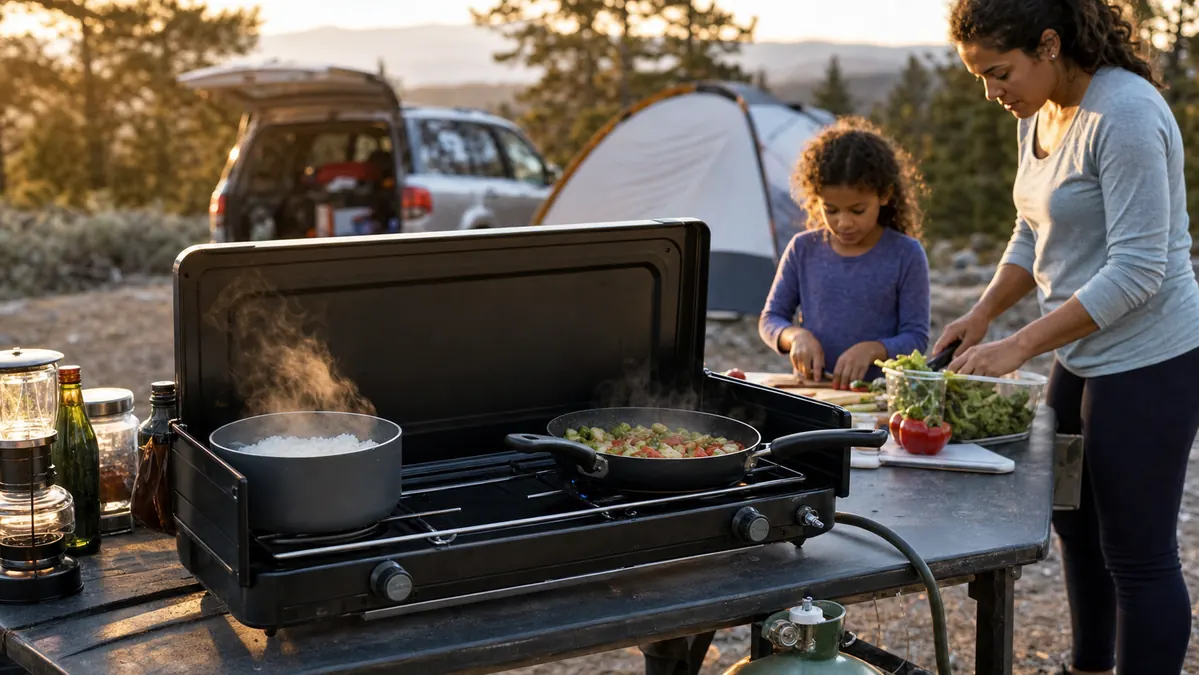
Most weekend campers eat like it's an emergency. Hot dogs off a stick, a bag of chips, cold cereal for breakfast because nobody wants to deal with a stove after a long drive. I get why it happens. But after a full season of car camping trips with my kids, and a lot of trial and error at the picnic table, I've learned there's a real difference between a campsite where you cook full meals and one where you just graze on snacks until bedtime. The stove is the whole story. A single burner keeps you stuck making one thing at a time. A double burner setup, like the Gas One propane stove I run at every campsite now, is what actually lets you cook a real meal, a protein and a side, hot and ready at the same moment, the way you'd do it at home.
This guide walks through the five-step system I use on every trip now, from how I set up the kitchen area to how I plan the menu around two flames instead of one. I'll be specific about the stove I use, because gear matters here more than people expect. I run a Gas One double burner propane stove, and most of what follows assumes you have (or are looking at) something similar, two independently controlled burners, a windscreen on at least one side, and enough output to actually sear something instead of just warming it. None of this requires fancy technique. It requires a plan, a little prep done before you leave the driveway, and a stove that can hold a low simmer on one side while you're working hard on the other.
The stove decides whether you're cooking or just heating up snacks
If your current setup is a single burner or a cheap butane unit that struggles in wind, the whole system below gets harder. The Gas One double burner stove gives you two independently controlled flames and enough output to sear and simmer at the same time, which is the difference between a real dinner and a bag of chips.
Amazon Check Today's Price on Amazon →Step 1: Set Up a Real Camp Kitchen Station, Not Just a Folding Table
Before you cook anything, give the stove a proper station. I look for a flat, stable surface, either a dedicated camp kitchen stand or a sturdy folding table rated for actual weight, not the flimsy card-table style ones that wobble the second you set a full pot down. The stove needs to sit level. A tilted stove means grease pooling to one side of the pan and a simmering pot that only simmers on half its surface.
Position matters as much as the table. Set the stove up outside, in open air, at least several feet from your tent and any other fabric shelter. Propane stoves burn cleanest with good airflow, and running one inside a tent, screen room, or any enclosed space is a real carbon monoxide risk, not a minor inconvenience. I always cook in the open, with the stove angled so wind hits the windscreen side rather than blowing straight across both burners and killing your flame.
I keep a second folding table or a large plastic bin right next to the stove for prep space, because you will run out of room on the stove table itself the moment you have a cutting board, a spice kit, and two pots going. Having a dedicated prep zone next to the cooking zone is the single biggest thing that separates a smooth camp dinner from a stressed one.
Step 2: Build a Menu That Actually Uses Both Burners
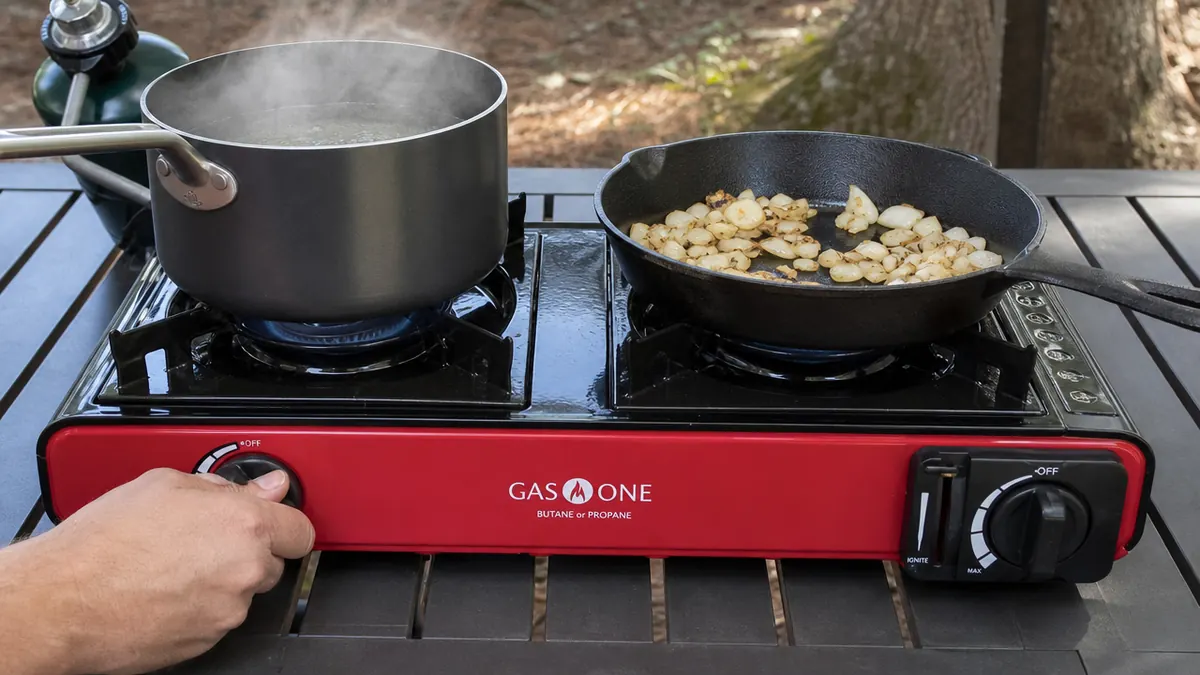
A two-burner stove is wasted if you plan meals like you only have one flame. Most of my go-to camp dinners are built around a protein on one burner and a starch or vegetable on the other, timed so they finish within a few minutes of each other. Chicken thighs searing in a cast iron pan on the right burner, a pot of rice or couscous simmering on the left. Foil-wrapped sausages and peppers on one side, a pot of pasta on the other. The actual advantage of a double burner stove over a single one isn't speed, it's that you can hold a low simmer on one side while you actively work the other, which is exactly how a real kitchen operates.
I plan the week's meals before I leave the house, not at the campsite. Three or four dinners, each one built around whatever protein I'm bringing, with a simple starch and one vegetable. I write the order of operations for each meal on an index card: what goes on first, what needs stirring, when to start the second burner. It sounds like overkill until you're standing at the stove at 6:30pm with hungry kids and you can't remember whether the rice needs 15 minutes or 20.
Breakfast gets the same treatment. Eggs and bacon on two burners at once beats trying to cook them in sequence in one pan, because the bacon fat is still going cold by the time the eggs are ready if you only have one flame to work with. This is the exact scenario where a single burner unit falls apart and a double burner stove earns its keep.
Step 3: Prep Everything Before You Leave the Driveway
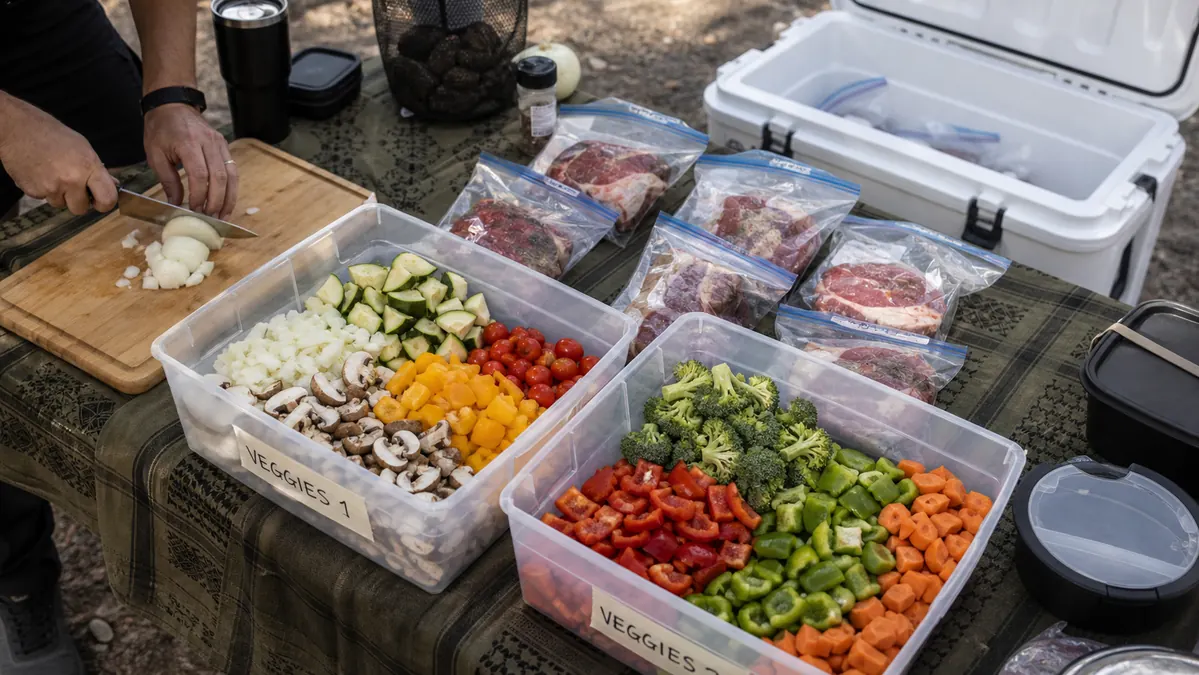
Camp cooking goes wrong most often because people try to do their prep work at the campsite instead of at home. I chop vegetables, portion meat into labeled bags, mix dry spice blends, and even pre-cook things like rice or beans partway, all before the cooler gets packed. Everything goes into stackable bins or bags labeled by meal and day, so on night two I'm not digging through a cooler full of loose ingredients trying to figure out what goes with what.
This matters even more with a two-burner stove, because the whole point is running two things at once, and you can't do that if you're still dicing an onion when the pot on the left is already boiling over. Pre-measured spice packets and pre-cut vegetables mean both burners can go from cold to cooking in the same five-minute window, which is what makes a full meal actually come together instead of one dish sitting done and cold while you finish the other.
Step 4: Control Heat Like You Would at Home
Camp stove burners are not one-size heat sources, even though a lot of first-time campers treat them that way. My Gas One stove has independent control valves on each side, so I run one burner low and steady for something like rice or a simmering sauce, and the other burner up higher for a hard sear on meat or vegetables. Learning to read your specific stove's flame, how low it can actually go without sputtering out, how high it can go before it scorches a thin pan, takes maybe two or three meals before it becomes second nature.
Wind is the biggest variable outdoors that you don't deal with in a kitchen. A gust across an open flame can drop your heat output by half without you noticing, which is why the windscreen panel on a stove like this one isn't a nice-to-have, it's doing real work. On breezy evenings I'll angle the whole stove so the wind hits the screened side and position myself as a partial windbreak for the open side while I'm actively cooking there.
Cast iron holds heat more evenly than thin aluminum camp pans, which matters a lot when your heat source can waver with wind. I keep one small cast iron pan in the camp kit specifically for searing, and a lighter aluminum pot for anything that just needs to simmer or boil. Matching the cookware to the job, not just grabbing whatever's on top of the bin, makes the stove perform closer to how it does in reviews and less like a frustrating variable.
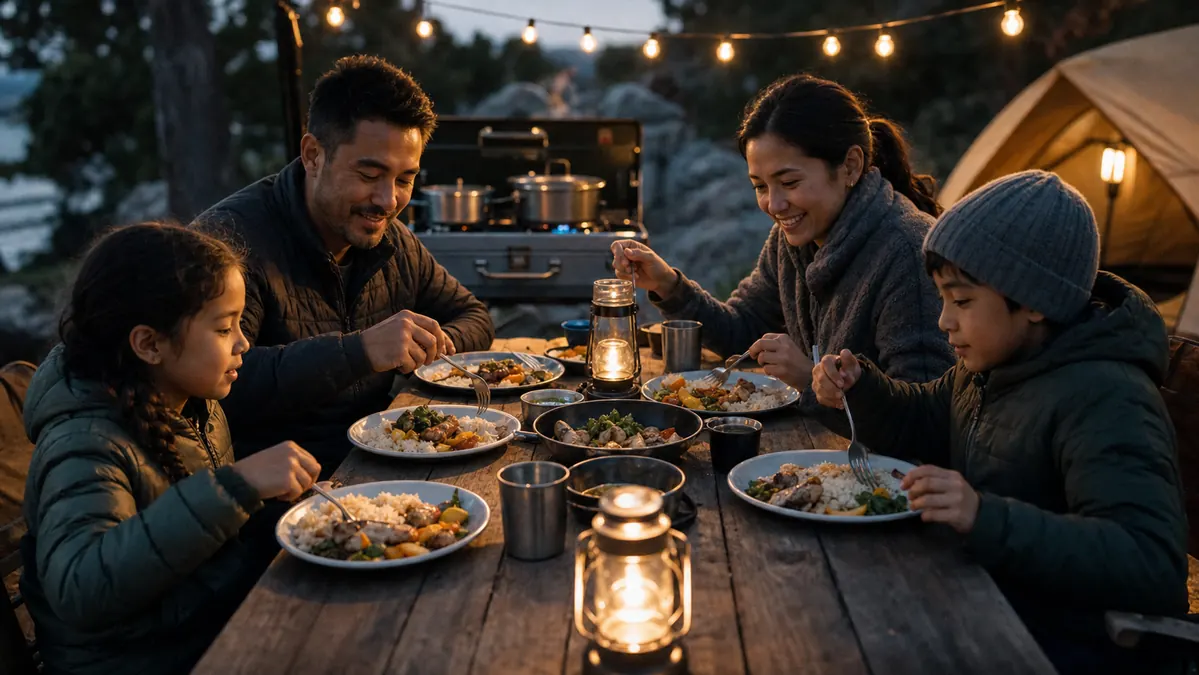
Step 5: Handle Food Safety and Cleanup the Right Way
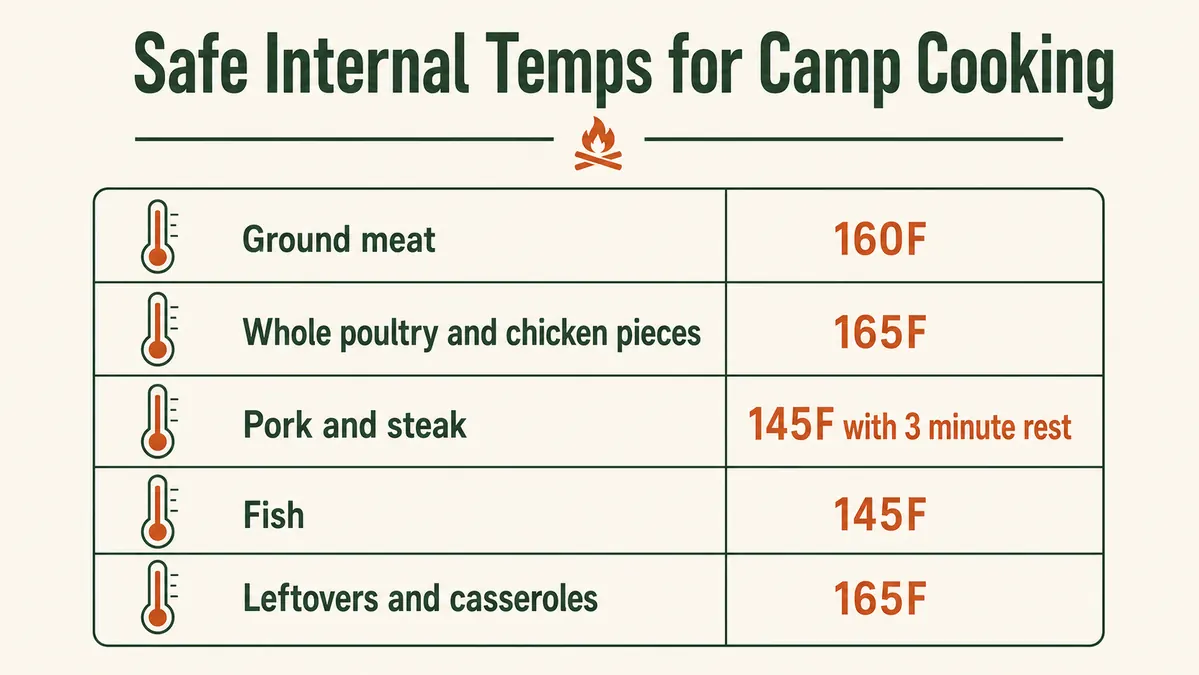
Food safety at camp isn't optional just because you're outside. Raw meat stays in its own sealed bag at the bottom of the cooler, away from anything you'll eat without cooking, and I use a separate cutting board for raw protein versus vegetables. I carry an instant-read thermometer in the kitchen kit and actually use it: ground meat to 160F, chicken and other poultry to 165F, pork and steak to 145F with a few minutes rest, fish to 145F. Guessing by color or how long something's been on the pan is how people get sick on trip two, not trip one, once they've gotten a little too confident.
Perishables don't get to sit out. Anything that came out of the cooler goes back in within two hours, or within one hour if it's a genuinely hot day above 90F. I keep the cooler packed with enough ice to hold 40F or below for the whole trip, and I check it with a small thermometer rather than assuming ice equals cold enough. This is also why the prep-at-home step matters twice over: less time with raw ingredients exposed at the campsite means less opportunity for something to sit in the danger zone.
Cleanup happens right after the meal, not the next morning. I fill one pot with hot water straight off the stove while everyone's still eating, so by the time plates are cleared the wash water is ready. Grease and food scraps get scraped into a trash bag, never dumped on the ground or into a fire pit, and dishes get a hot soapy wash followed by a rinse. It takes ten extra minutes and it means the stove and pans are ready to go again in the morning instead of becoming a chore nobody wants to face over coffee.
What Else Helps
A few small additions make the whole system smoother: a dedicated propane tank wrench for stubborn connections, a windscreen or reflective panel if your site is exposed, and a simple folding organizer for spices and utensils so you're not digging through a bin mid-cook. None of these replace a capable stove, they just make the two-burner cooking system above easier to run trip after trip. If you're still deciding between models, I laid out what actually held up over a season of use in my full review of the Gas One double burner stove.
The stove doesn't cook the meal for you, but a good one stops getting in the way, and that's the whole difference between hot dogs on a stick and an actual dinner.
Two burners, one real dinner, every night of the trip
Once you've got the prep, the menu, and the heat control down, the only thing left is a stove that won't fight you. The Gas One double burner propane stove has held up across a full season of weekend trips for me, independent flame control on each side, a solid windscreen, and enough output to actually sear.
Amazon Check Today's Price on Amazon →